

babbling brooks
things about stuff
wine cork message board
I started out the project by asking my husband to make a frame for me. He used one inch square strips of wood, mitered the corners, and screwed them together. Then we glued a scrap from some old wood paneling to the frame as its back. This worked very well for my application. Any size frame will work (even a picture frame), but it does need a sturdy backing.
What I would change: I did not realize how much gapping there would be between the corks, no matter how hard I tried. If I were to do this project over, I would paint or paper the background so that little bits peeping out would look intentional.
I used the "Power Grab" glue in the photo until it ran out, then I used "Liquid Nails". I had planned to use my hi-temp glue gun, but thought that all the little strings would drive me crazy, and I didn't know how well it would stand up over time. I want this board to be useful, not just decorative, so used the construction adhesives in hopes of adding durability.
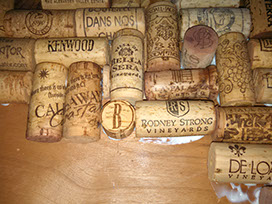
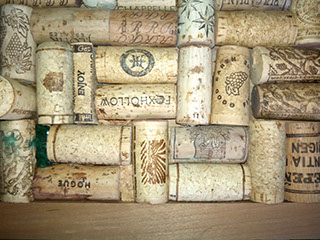
I realized almost immediately that I would need to sort the corks, at least somewhat. If you are a normal person and not a freak like me, you can skip this step. I started out just sorting into two piles: use and not use. Then I went on to sort into text and image, blank, vineyard name, and so on. Even a normal person might want to pay attention to placement, so you don't have all one look in one area. Of course, if you always drink the same brand, this doesn't apply to you either!

You can choose whether you want to glue the corks in a pattern, or at random. Be aware, however, that no matter what you do, things will not come out evenly. If you accept that at the beginning and plan accordingly, the project will be much more pleasurable.
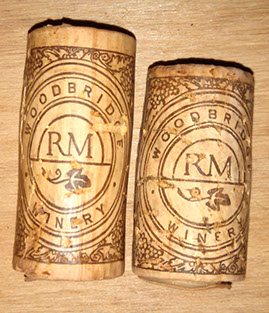
Seriously. I promise you. Unless you are using composite corks, or corks made for crafting, they are all different sizes. Even the same brand and variety can have differently sized corks.
There will be spaces, and things will not turn out evenly, so be sure to work from all edges of the frame at the same time (or work from the center outward). Otherwise, you will end up with all the spaces along one side.
Don't worry about the spaces, and take care of them at the end if they bother you.
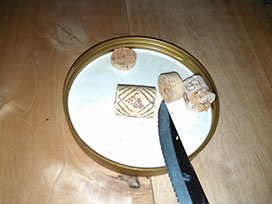
You will find that sometimes a cork will ALMOST fit where you want it, but not quite. Corks are very easy to saw through with a serrated knife or craft saw. Save the bits and pieces, you will want them later!

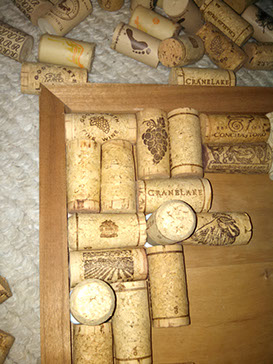
Just keep on a-gluing until the frame is filled. You can see that I did the corks both directions, and sometimes up on end. Cut a cork in half, and each half can make a nice little circle on the board. I was lucky enough to find a cork with my last initial on it, so featured it as well as I could. Some corks also have the vintage date on them. Fun if you can find years that are significant to you and your family. The years I found were not significant, but I used them anyway!
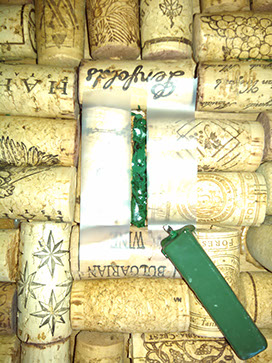
Here is my attempt at filling in some gaps. I happened to have some sealing wax on hand, so melted some into a couple of the larger gaps. My idea was that it would look a little like the wax seals atop some wine corks. I am ambivalent at the results: it was a little . . . chunkier that I was hoping for. I ended up just slicing more cork bits and tucking them into the larger gaps. Your call.
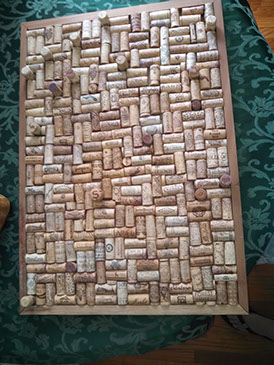
The finished project.
As you can see, it you aren't zooming in on it, the gap fills are unnoticeable.
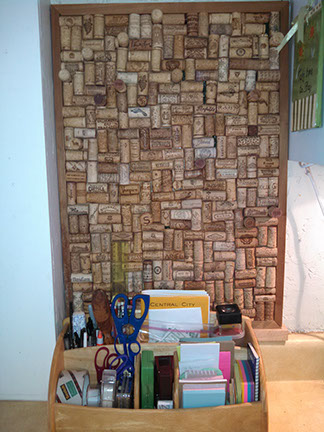
And, since it is a bulletin board, you can always pin something over any imperfections.
Hope this was helpful, and that you have fun making your corkboard!
© 2016 arizona brooks creations, llc